This is the most complete guide you’ll ever need to build a gaming PC. Welcome, future PC builder! I’m not just talking about a simple guide that shows you how to put things together. Oh no, we’re going a lot deeper than that. As a top tech blogger, I’ve read a lot of guides that don’t go into enough detail about the “why” behind the “what.” It’s not just about putting parts together; it’s also about understanding how hardware works together, the excitement of making something with your own two hands, and finally, building a machine that will let you explore amazing digital worlds.
It’s easier than ever to build a gaming PC in 2025, but there are so many options that it can be hard to know where to start. This guide will help you get over that paralysis. We’ll make the process easier to understand by breaking it down into a series of small, manageable, and even fun steps. By the end of this masterclass, you’ll not only have a powerful gaming PC, but you’ll also feel more confident in your technical skills. So, get your favorite drink, get comfortable, and let’s go on this exciting trip together.
Why Build a Gaming PC in 2025? The Best Benefits
Before we get into the details of choosing and putting together parts, let’s talk about the “why.” Is it still worth it to build your own gaming PC in this age of powerful consoles and cloud gaming? Yes, the answer is yes. This is why:
Unmatched Performance: This is the most important thing. At the same price, a custom-built gaming PC can do things that pre-built systems and consoles can’t. You can pick the best parts on the market, which will let you push frame rates to their limits and play games at ultra-high resolutions with all the eye candy turned on.
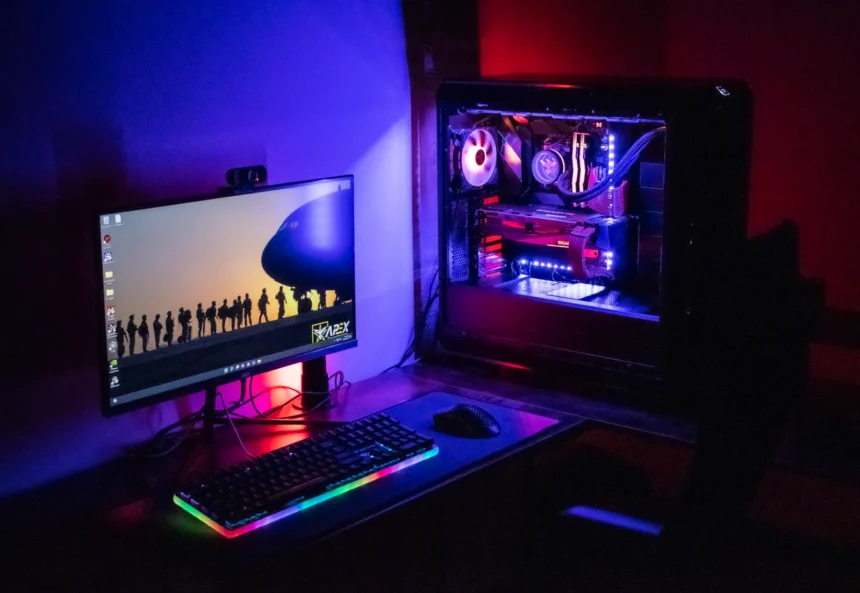
Full Customization: You can change every part of your gaming PC to fit your exact needs, from the sleek, minimalist case to the bright RGB lights that pulse to the beat of your in-game audio. It’s not just about how it looks; it’s also about making a machine that really reflects who you are.
Future-Proofing and Upgradability: Technology changes quickly, but you can always upgrade your custom gaming PC. You can just take out the old graphics card and put in the new one when it comes out. Do you need more space for your growing collection of games? Not a problem. This modularity means that your gaming PC can change as your needs and the needs of future games change.
Long-Term Cost-Effectiveness: The initial cost may be higher than that of a console, but the savings over time can be significant. You can pick parts that give you the best value for your money, and you can upgrade parts as needed, so you won’t have to buy a whole new system every few years.
A Rewarding and Educational Experience: It feels great to turn on a computer you built yourself. The process will give you useful skills in computer hardware and troubleshooting, which are becoming more and more important in our tech-driven world.
The Heart of the Beast: Picking the Parts for Your Gaming PC
This is when the real fun starts. Choosing the right parts is the most important step in building a gaming PC. The performance of your rig depends on how well each part works with the others. Let’s look at each part, what to look for, and our top picks for 2025.
The Central Processing Unit (CPU): The Brain of Your Operation
The processor, or CPU, is what makes your gaming PC work. It does all the hard math and follows all the rules that make your games work. Clock speeds and single-core performance are very important for gaming. Intel and AMD are the two biggest companies that make CPUs. They both have great options for every budget.
- What to Look For:
- Cores and Threads: A CPU with at least 6 cores and 12 threads is best for playing games today. This will make sure that demanding games run smoothly and that you have enough extra power for multitasking.
- Clock Speed: This tells you how many cycles a CPU can do in a second. It’s measured in gigahertz (GHz). For gaming, higher is usually better.
- Cache Size: A bigger cache lets the CPU get to data that it uses a lot faster, which can make games run better.
- Interlink: Our guide to the best CPUs for gaming in 2025 will give you a better idea of what’s going on in the CPU market right now.
The Graphics Processing Unit (GPU): The Visual Powerhouse
The graphics card, or GPU, is probably the most important part of a gaming PC. It makes the beautiful graphics that make your games come to life. This is where a big part of your budget will probably go. In this area, NVIDIA and AMD are the most important players.
- What to Look For:
- VRAM (Video RAM): 8GB of VRAM is the best amount for gaming at 1080p. You should aim for 12 GB or more for gaming at 1440p or 4K.
- Clock Speeds and Core Counts: Like CPUs, more processing cores (CUDA cores for NVIDIA and Stream Processors for AMD) and higher clock speeds usually mean better performance.
- Ray Tracing and DLSS/FSR Support: These technologies improve the quality of the images and the number of frames per second, respectively. Make sure the GPU you choose supports these features if they are important to you.
- Tom’s Hardware’s GPU Hierarchy is a great place to compare the performance of different GPUs.
The Motherboard: The Brain and Spinal Cord
Your gaming PC’s motherboard is what connects all of its parts and lets them talk to each other. The motherboard you pick will depend on the CPU you choose (Intel and AMD use different sockets) and what features you need.
- Things to Look For:
- Socket Compatibility: Make sure the motherboard’s socket is the same as your CPU’s (for example, LGA 1700 for new Intel CPUs and AM5 for new AMD CPUs).
- Chipset: The chipset decides what features your motherboard will have, like how many USB ports, PCIe lanes, and support for overclocking it will have.
- Form Factor: The size of the motherboard (ATX, Micro-ATX, or Mini-ITX) will determine what size case you can use.
- RAM and Storage Support: Find out how many RAM slots the motherboard has and what kinds of storage drives it can use (SATA, M.2).
Memory (RAM): To Make Multitasking and Gaming Go Smoothly
Your PC’s short-term memory is called RAM (Random Access Memory). It keeps information that your CPU needs to get to quickly. Having enough fast RAM is very important for a gaming PC to run smoothly and not stutter.
- What to Look For:
- Capacity: Most gaming PCs are best with 16 GB of RAM right now. 32GB is a good upgrade for high-end builds or when you need to do a lot of things at once.
- Speed: Faster RAM, measured in megahertz (MHz), can make some games run much better. For DDR5, speeds of 6000 MHz or higher are good.
- CAS Latency (CL): This shows how long it takes for RAM to respond to a command. It’s better to have a lower CL number.
Storage: Where Your OS and Games Are
The files that make up your operating system, games, and other things are all stored on your storage drive. The speed of your storage has a direct effect on how long it takes to load games and how responsive your computer is overall.
- Different kinds of storage:
- Solid State Drives (SSDs): These are a must-have for any modern gaming PC because they are much faster than regular hard drives.
- NVMe M.2 SSDs: These are the fastest consumer-grade SSDs you can buy. They plug directly into the motherboard for super-fast speeds. This is the best option for your operating system and games you play a lot.
- Hard Disk Drives (HDDs): HDDs are slower, but they have a lot more storage space and cost less. They are a good way to keep big files, media, and games that you don’t play very often.
- Backlink: If you want a pre-built option with great storage options, you might want to check out what iBUYPOWER has to offer.
The Power Supply Unit (PSU): The Unsung Hero
People often forget about the PSU, but it’s one of the most important parts of your gaming PC. It gives all of your parts clean, steady power. If you don’t spend enough on the PSU, your computer may not work right, crash, or even break other parts.
- What to Look For:
- Wattage: The PSU’s total power output. Use a PSU calculator to figure out how many watts your system will need, and then add a little extra for future upgrades.
- Rating for Efficiency: Look for a PSU that has an 80 Plus rating (Bronze, Silver, Gold, Platinum, or Titanium). A higher rating means that the PSU is better at turning power from the wall into usable energy, which means less wasted energy and heat.
- Modularity: Modular PSUs let you take off cables you don’t need, which makes the build cleaner and easier and improves airflow.
The Case: Where Your Hardware Lives
The PC case is more than just a box; it’s where all your important parts live. A good case will not only look good, but it will also let air flow freely to keep your hardware cool and quiet.
- What to Look For:
- Size and Compatibility: Make sure the case is big enough to fit your motherboard and GPU.
- Airflow: To get the best cooling, look for cases with mesh front panels and lots of places to mount fans.
- Cable Management: A good case will have things like cable routing channels and tie-down points to help you keep your build neat and tidy.
- Looks: Pick a case that fits your style, whether it’s a sleek black box or a colorful RGB-lit work of art.
The Assembly Process: A Step-by-Step Guide to Building Your Gaming PC
It’s time for the most fun part now that you have all the parts: the build! Don’t rush, be careful, and don’t be afraid to look at the manuals for your motherboard and parts.
Getting Ready is Important
- Workstation: Look for a big, clean, and well-lit place to work. A table made of wood or plastic is best. Don’t build on carpet because it can make static electricity.
- Tools: You will need a Phillips head screwdriver, cable ties or Velcro straps to keep your cables neat, and an anti-static wrist strap to keep your parts safe from electrostatic discharge.
- Manuals: Always have your component manuals close by. While you’re building, they’re your best friends.
Putting It Together Step by Step
- Getting the Motherboard Ready:
- Put in the CPU. Lift the retention arm, line up the triangle on the CPU with the triangle on the socket, and carefully put the CPU in. Lock the retention arm in place.
- Put in the M.2 SSD(s).
- Put in the RAM. Open the clips on the RAM slots, line up the notch on the RAM stick with the notch in the slot, and press down hard until the clips lock into place.
- Getting Ready for the Case:
- Put in the standoffs for the motherboard. These tiny screws keep the motherboard and the case apart so that short circuits don’t happen.
- Put on the I/O shield that came with your motherboard.
- Installing the Motherboard:
- Carefully lower the motherboard into the case so that it lines up with the standoffs and the I/O shield.
- Use screws to hold the motherboard in place.
- Installing the Graphics Card:
- Take off the right PCIe slot covers from the back of the case.
- Unlock the clip on the PCIe slot on your motherboard.
- Line up the graphics card with the slot and press down hard until it clicks into place.
- Use screws to attach the graphics card to the case.
- **Installing Storage:
- Put any extra SATA SSDs or HDDs in the drive bays of your case.
- Setting Up the Power Supply:
- Put the PSU in the case and use screws to hold it in place.
- Putting the Cables Together:
- Power Cables: These connect the 24-pin motherboard power connector, the 8-pin CPU power connector, and the PCIe power connectors for your graphics card. Connect power to the drives that store your data.
- Data Cables: You can connect your SATA drives to the motherboard with SATA cables.
- Connectors for the Front Panel: This is the part that can be the hardest. To connect the power switch, reset switch, USB ports, and audio jacks from the front of your case, look at the manual for your motherboard.
- Managing Cables:
- Take your time to carefully route the cables behind the motherboard tray. You can use cable ties or Velcro straps to hold them all together. Not only does good cable management look good, it also lets air flow better.
The First Boot and Software Installation: Getting Your Gaming PC Up and Running
This is the time to find out the truth. It’s time to turn on your new gaming PC and install the operating system now that it’s all put together.
The First Time It Turns On
- Check Everything Twice: Before you turn on the power, make sure all your connections are working.
- Connect Peripherals: Connect your keyboard, mouse, and monitor.
- Turn on: Push the button that says “power.” You should see the BIOS/UEFI screen on your monitor if everything is hooked up right.
Setting Up the BIOS/UEFI
- Enter the BIOS: To get into the BIOS, press the right key (usually Del, F2, or F12) when the computer starts up.
- Turn on XMP/EXPO: This will let your RAM run at the speed that was advertised.
- Set Boot Priority: Make sure that your USB drive with the Windows installer is the first thing your computer boots from.
Setting Up Windows
- Make a USB Drive That Can Boot: To make a bootable USB drive, you’ll need to use another computer to download the Windows Media Creation Tool from the Microsoft website.
- Install Windows: Restart your computer while the USB drive is still plugged in. The installer for Windows should start. To install Windows on your NVMe SSD, just follow the steps on the screen.
Setting up Drivers and Important Software
- Motherboard Drivers: Go to the manufacturer’s website and get the most recent drivers for your motherboard. Drivers for the chipset, LAN, audio, and USB are all included.
- Drivers for your graphics card: Go to the NVIDIA or AMD website and get the most recent drivers for your GPU.
- Important Software: Get a web browser, your favorite gaming platforms (like Steam, Epic Games Store, etc.), and any other software you need.
Useful Tips for Your New Gaming PC: A Daily Life Guide
It’s only the beginning to build a gaming PC. Here are some useful tips you can use every day to get the most out of your new rig and make sure it runs well for years to come:
How to Keep Your Gaming PC Cool and Clean
- Regular Dusting: Dust is bad for any gaming PC. It can block fans, keep parts from getting too hot, and cause overheating. Every few months, get in the habit of dusting your PC. Use compressed air to blow dust out of the fans, filters, and heatsinks.
- Clean Your Filters: Most modern PC cases have dust filters that can be taken out. To keep the airflow at its best, clean these often.
- Keep an Eye on Your Temperatures: Use software like HWMonitor or MSI Afterburner to keep an eye on the temperatures of your CPU and GPU, especially when you’re playing games hard. It might be time for a more thorough cleaning if you see the temperatures rising.
Improving Software and Games
- Update Your Drivers: Make sure to check for and install the most recent drivers for your graphics card and other parts on a regular basis. New drivers often fix bugs and make games run better.
- Settings in the Game: Don’t be afraid to change the graphics settings in the game. Finding the right balance between performance and visual quality can make a big difference in how much fun you have playing games.
- Control Startup Programs: Your PC can slow down if too many programs start up at the same time. To stop programs from starting up that you don’t need, use the Task Manager.
Healthy Gaming Habits and Ergonomics
- Get a Good Desk and Chair: You’ll be spending a lot of time at your new gaming PC, so make sure your setup is comfortable and good for your back. A good chair with good lumbar support and a desk that can be adjusted can help keep your back and neck from hurting.
- Take Breaks Often: It’s easy to forget about the time when you’re playing a game. Take breaks often to stretch, rest your eyes, and drink plenty of water. The 20-20-20 rule is a good one: every 20 minutes, look at something 20 feet away for 20 seconds.
- Good Lighting: Good lighting in the room can help your eyes feel less tired. Don’t play video games in a room that is completely dark.
Fixing Common Problems
You might still have some problems even if you plan and carry out your build carefully. Don’t freak out! Most of the time, it’s not too hard to fix common problems.
- PC Won’t Turn On:
- Make sure the power cable is plugged in all the way and the PSU switch is on.
- Put all of your power connections back in the motherboard.
- Make sure the connector for the front panel power switch is plugged into the motherboard correctly.
- **Monitor Doesn’t Show Anything:**
- Make sure your monitor is plugged into the graphics card and not the motherboard’s video output. If you don’t have a dedicated GPU, this is not necessary.
- Put your graphics card and RAM back in their slots.
- Your PC crashes or freezes:
- There could be a number of reasons for this, such as overheating, unstable overclocks, or problems with drivers.
- Keep an eye on your temperatures and make sure your parts are cool enough.
- If you’ve overclocked your CPU or GPU, try putting them back to their default settings.
- Check to see if all of your drivers are up to date.
Your Journey as a PC Builder Has Just Begun
Good job! You have now read the best guide on how to build a gaming PC. You now know about the parts, how to put them together, how to install software, and how to take care of your new rig. The trip you’re on is more than just a one-time thing; it’s a way to meet a lot of other people who love PCs and are very passionate about them.
The things you’ve learned will help you improve, fix, and keep improving your gaming PC for years to come. You are no longer just a user of technology; you are a creator. Now go ahead and enjoy the fruits of your labor. Welcome to the great world of PC gaming! May your temperatures be low and your frame rates be high.